The Bowl
Week 2 of our course - we started this week by gathering materials. This lead us to the beginning of making our bowl, which was a very different process then i had ever seen or thought of.
The process:
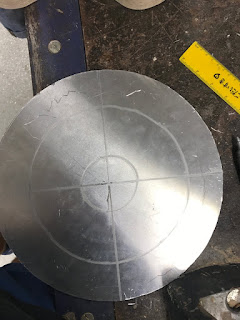
Step 1 - this step was the setting up the layout of our bowl. we had to draw circles close to the centre and then drawn another one close to the edge of the material. This informed us about where we should be trying to hit in order to create our bowl shape.
The process:
Step 1 - this step was the setting up the layout of our bowl. we had to draw circles close to the centre and then drawn another one close to the edge of the material. This informed us about where we should be trying to hit in order to create our bowl shape.
Step 2 - We began hitting the bowl with the pointy end of the hammer so that it could create tucks in the aluminium. This meant that we could being to shape the bowl and start getting a bit of depth into it
Step 3 - after we had shaped the bowl we then started to sculpt it, meaning that we were trying to get it a bit deeper and then, began to work the material out. This was done on the sand bag
Step 4 - After we were happy with the shape we then put it on a dolly which meant that we could attempt to make it smoother, However with such a large object it could of taken awhile. so we turned to the english wheel in order to get that smoothness that we were after.
step 5 - this was the final step and basically the touch ups. we sanded down the edges and then polished it to give it a nice finish
finished product:


Comments
Post a Comment