Posts

Showing posts from April, 2017

The Blister

Image
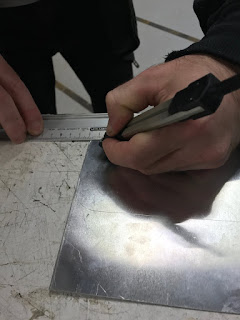
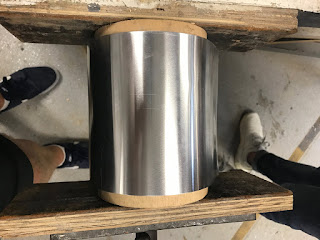
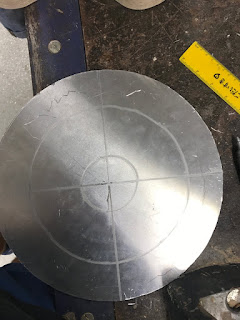
This week saw an introduction into a new machine that we had not yet used which was the CNC Machine. This assisted in the making of the Blister The Process: Step 1: We began with the templates being cut out for us. then we had to pick what shape we wanted to create. Step 2: once we had picked what shape we wanted we then cut the aluminium into the appropriate size for the template. This was then squished between the two pieces that was cut out from the CNC machine. Then it was just a matter of hitting the aluminium into the void underneath. Previous week when using a metal hammer i realised that it leaves marks on the material so i tried wrapping a cloth around my hammer to reduce this Step 3: once i had created my blister i took it out of the template and then cut the excess material off, in order to just have the blister shape. once that was done it was just a matter of making it smooth and nice. Final:

The Tray

Image
This week saw us pair into groups to make tray. The aim was to make a tray that was identical to your partners. I paired with Eoin Campbell. The Process: Step 1: This was the beginning of our design so we had to determine what size we wanted the tray to be at. once we decided we then had to measure the aluminium and cut out the tray  Step 2: we then cut out a wooden block as a template which we could use to form the tray around in order to create unity between our two trays. Step 3: once these templates were cut out we places them in the vice and began to start hitting it with the appropriate hammer. Starting with the sides then moving onto the curves.  Step 4: after this it was just about correcting any mistakes that were hit into the metal, and adjusting the corners so that they were correct. Final product: 

The torus

Image
A torus is a three dimensional (3D) donut-shaped geometric shape.  This class seemed to be an experiment in a sense to determine the best method of achieving this complex shape The Process:  Step 1: after many attempts at different methods i achieved the shape by using the wood block as a t emplate. The notion behind this was that you would work with a partner, They would hold the aluminium down while you hit the aluminium into the groove that was in the block which would give that donut shape.   Step 2: After creating the basic shape i took it off the block and used the sand bag to being to alter the shape making it deeper give it a more dramatic inner curve   Step 3: once i was happy with the depth of the torus i then use a metal pipe to create a nice radius for the ouster parts of the shape.  Step 4: once that was complete it was then about time to create an extra curve to finish of the shape. I began using a dolly on the very edge of the object to create a slight

The Bowl

Image
Week 2 of our course - we started this week by gathering materials. This lead us to the beginning of    making our bowl, which was a very different process then i had ever seen or thought of. The process: Step 1 - this step was the setting up the layout of our bowl. we had to draw circles close to the centre and then drawn another one close to the edge of the material. This informed us about where we should be trying to hit in order to create our bowl shape. Step 2 - We began hitting the bowl with the pointy end of the hammer so that it could create tucks in the aluminium. This meant that we could being to shape the bowl and start getting a bit of depth into it Step 3 - after we had shaped the bowl we then started to sculpt it, meaning that we were trying to get it a bit deeper and then, began to work the material out. This was done on the sand bag  Step 4 - After we were happy with the shape we then put it on a dolly which meant that we could attempt to make it smooth