Assessment Two Ferrari 250 GTO
Assessment Two saw the class split into groups of six. once the groups had been selected they then went off to talk about the assessment task.
'As a team students
will create a scale
template for a Ferrari
250 gto and then
divide it into equal
portions. As
individuals they will
create an aluminium
skin to adhere to their
portion of its
contours.'
The first step of this assessment task was to create the template for our group to work on. This was a challenging task at first as the program that we were given was not available any more as well as the fact that it was our first time using this program. However once this problem was over come we then spliced the 3D digital template, allowing for us to create a waffle structure.

Once that was done we then placed tape over the model in order for us to visualise the car correctly

This gave us a better understanding of how each panel would look as well as where each piece had to curve.
Once this was done we then selected the pieces that we wanted. My piece was the main body piece of the back of the car. in order for us to get a basic idea of how to cut our piece out we placed paper over the top of the car and drew around where our panel would go. once that was done this was then translated onto the aluminium piece for us to cut out.
i left my piece an extra 5mm around the line that i was suppose to cut allowing for excess material if needed in areas, however this became a slight problem as i did in fact have to cut a lot of it off but it was hard trying to shape that aluminium sheet while its much larger than it should.
the first week saw me try and develop the basic shape of the back of the car, whilst also trying to match up with my group members to try and get a feel for where the join would be.


 After that stage was complete it was time to smoothen it up and finish making the rest of the shape so that it could fit in with my group members pieces.


The first step of this assessment task was to create the template for our group to work on. This was a challenging task at first as the program that we were given was not available any more as well as the fact that it was our first time using this program. However once this problem was over come we then spliced the 3D digital template, allowing for us to create a waffle structure.

Once that was done we then placed tape over the model in order for us to visualise the car correctly

This gave us a better understanding of how each panel would look as well as where each piece had to curve.
Once this was done we then selected the pieces that we wanted. My piece was the main body piece of the back of the car. in order for us to get a basic idea of how to cut our piece out we placed paper over the top of the car and drew around where our panel would go. once that was done this was then translated onto the aluminium piece for us to cut out.
i left my piece an extra 5mm around the line that i was suppose to cut allowing for excess material if needed in areas, however this became a slight problem as i did in fact have to cut a lot of it off but it was hard trying to shape that aluminium sheet while its much larger than it should.
the first week saw me try and develop the basic shape of the back of the car, whilst also trying to match up with my group members to try and get a feel for where the join would be.

After i was happy with the basic shape it was just a matter of fine tuning each element of the piece and continually checking my piece. However this took much longer than i expected and a lot more work was involved than should of been.
a lot of the shaping that i did was done by using the english wheel and now looking back on the process this was probably a very unwise choice. as mention before my piece was already larger than it was suppose to be, using the english wheel did not help that problem as i was stretching the material making it much harder to get that necessary shape that i as after.

During the design it was starting to get a bit chaotic so we decided to 3D print the models so that we could look at the form of the car without interrupting the rest of the team

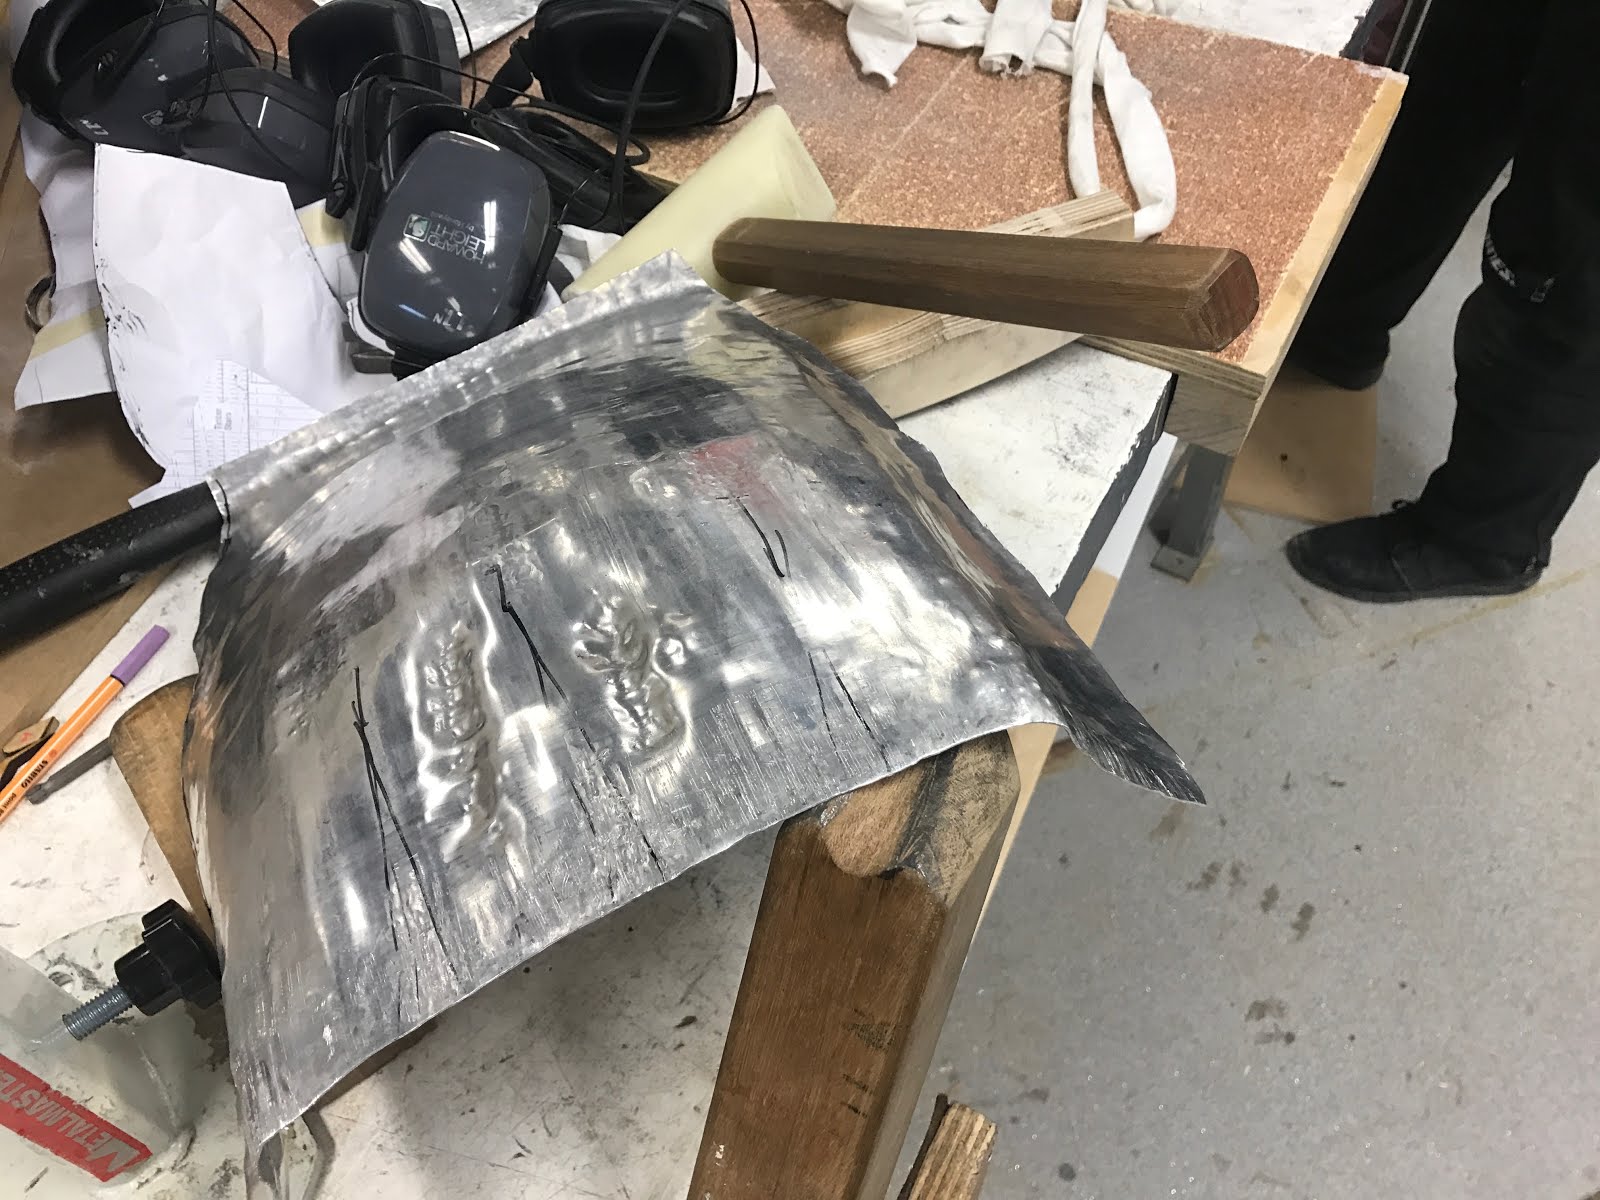
As you can see in this picture below although it was low at the front it was actually quite rounded in the middle and towards the back of the piece. it was not sitting on the waffle structure properly because of this.

After that process i start to shape the side of the piece


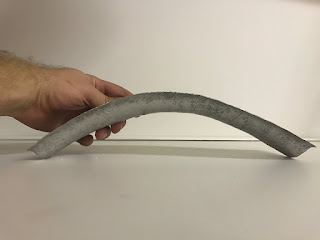
but as you can see this affected the middle of the piece, which saw me start to back peddle on my piece, and as a result i devoted a lot of time to trying to shrink my piece in the centre to make it flatter.

This was still not enough in the middle so it saw me attempt to shrink the middle but making it pucker in and then hitting that down.

However, this was not enough and was taking to long so it saw me turn to the method that we adopted during the torus which was to make it so that the material could not stretch back in to place.


This did the trick and shrank the middle section down whilst still keep the shape that i want. it was now just a matter of trying to smoothen all those bumps out. i did this with the english wheel under very light pressure. Although it still stretched it back a little it was still looking a lot better than it was before i did this technique


Once we were happy with it as just doing the final check to see how it fitted on the structure and also with my group.


Final


Comments
Post a Comment